Why Choose a Garden Window?
Have you ever wished for fresh herbs at your fingertips while cooking, or for a place to grow leafy greens through a long Midwestern winter? A garden window may be the perfect solution, especially if your kitchen window may need to be replaced. Whether you’re an avid home chef looking for a kitchen garden window or a green-thumbed homeowner hoping to extend your growing season indoors, a garden window creates a cozy, sun-soaked microclimate ideal for plant life.
In this article, we’ll explore what a garden window is, where it works best in your home, its benefits and drawbacks, and how to install one properly. If you’ve ever dreamed of adding a touch of the greenhouse lifestyle to your living space, keep reading.
What is a Garden Window?
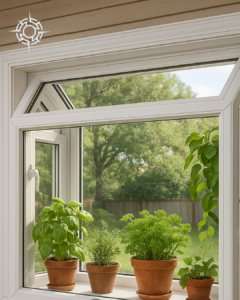
A garden window, sometimes called a greenhouse window or plant window, is a box-like structure that protrudes from the exterior wall of a home. Think of it as a small glass enclosure—a miniature greenhouse—with glass on all sides except the bottom. These windows are designed to let in sunlight from multiple angles, making them an excellent environment for growing herbs, succulents, or houseplants year-round. A new garden window might also save you money on your energy bills.
Typically built with shelving to accommodate multiple plants, garden windows are especially popular in kitchens. Not only do they offer a functional space to grow ingredients like basil, cilantro, or thyme, they also enhance the look and feel of the room with added greenery and natural light.
Most garden windows are constructed using insulated glass for energy efficiency and often feature operable side panels to allow for ventilation. The framing material can be vinyl, wood, aluminum, or a composite, depending on budget and design preferences. Because they extend beyond the wall, they also offer a small sill or shelf—perfect for both decorative plants and practical kitchen gardening.
Where Are Garden Windows Installed?
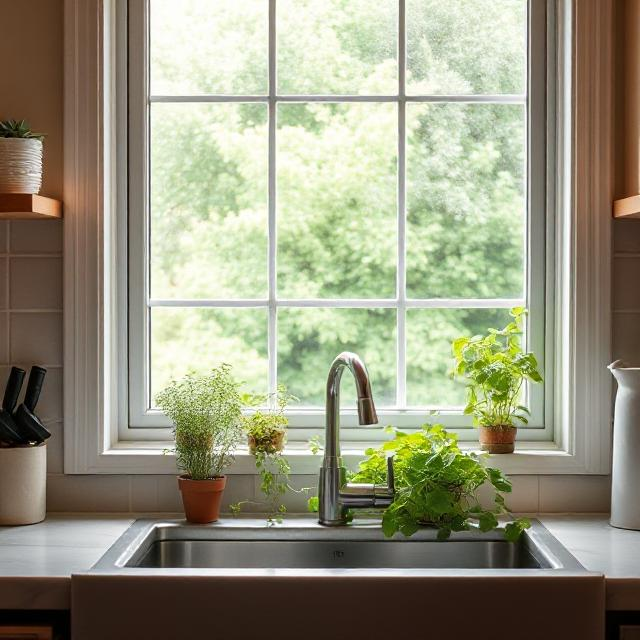
The kitchen garden window is by far the most common and practical installation—usually found just above the kitchen sink. This spot provides convenience, easy access to herbs, and a natural focal point for the space. Plus, kitchen sinks are typically placed along exterior walls, making installation more straightforward.
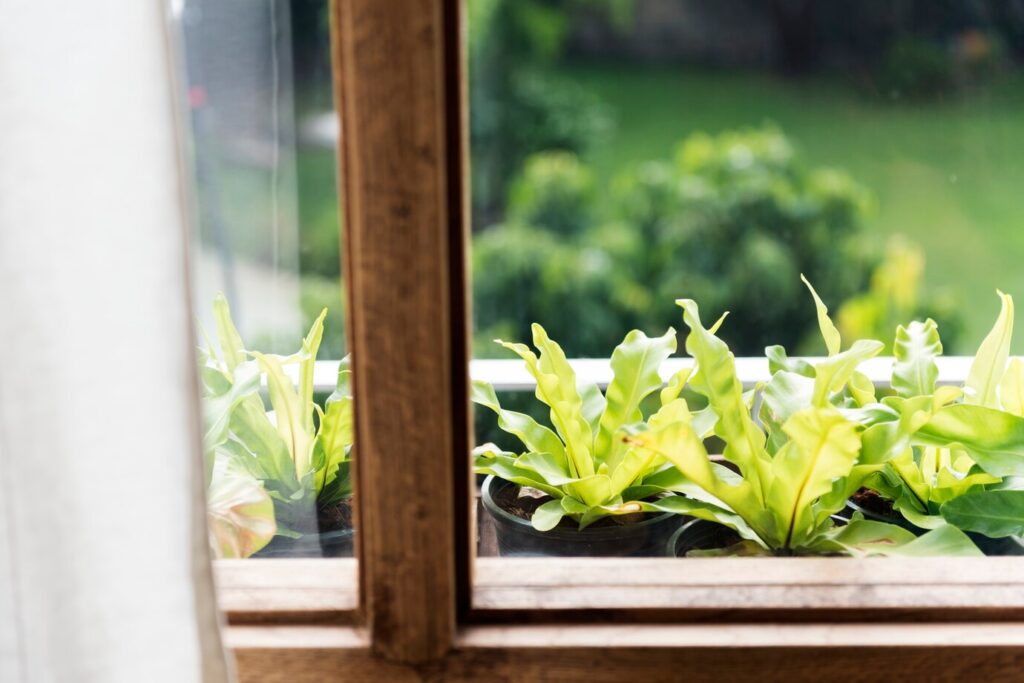
However, garden windows can be installed in any room where sunlight is abundant and the wall faces outdoors. They work best on south-facing walls, which receive the most consistent daylight throughout the year. Bedrooms, bathrooms, laundry rooms, and breakfast nooks are all great candidates for adding a bit of plant-loving flair.
Before committing to a location, consider both the interior function and exterior footprint—a garden window does extend outward and could interfere with walkways or outdoor features if not planned carefully.
Pros and Cons of Garden Windows
Like any home improvement project, garden windows come with both advantages and drawbacks. Understanding these will help you decide if a window greenhouse is right for your space.
Pros
- Sunlight, Sunlight, Sunlight
The biggest benefit of a garden window is access to natural light. With glass on three sides and the top, it acts like a greenhouse—amplifying sunlight and creating a warm environment ideal for plants. - Aesthetic Appeal
Garden windows provide a striking visual feature from both inside and outside the home. They add depth to a room and break up flat exterior lines with architectural interest. - Wellness Benefits
Bringing nature indoors is more than a style statement—it’s a health enhancer. According to research on Biophilic Design, exposure to plant life indoors can boost mood, improve air quality, and even enhance cognitive performance. - Homegrown Flavor
For home cooks, there’s nothing quite like snipping fresh herbs or microgreens right from the window. A garden window kitchen setup supports healthier eating and adds a gourmet touch to everyday meals.
Cons
- Energy Efficiency Challenges
All that glass can come at a cost. In colder climates, heat loss through the garden window may raise your energy bill—especially if it’s poorly insulated. In hot climates, solar gain may lead to overheating. - Moisture Management
With plants, sun, and enclosed space comes condensation. Without proper ventilation or material selection, garden windows can be prone to mold or moisture damage. - Exterior Space Intrusion
Since they extend past your home’s wall, garden windows may interfere with patios, paths, or neighboring structures. Be sure to evaluate how much room you have outside before installation. - Cost
A garden window is more expensive than a standard flat window due to the complexity of installation and the materials involved. However, many homeowners find the visual and practical payoff well worth the investment.
How to Install a Garden Window: Step-by-Step
While it’s always recommended to work with a qualified contractor, understanding the basic installation process can help you make informed decisions and set realistic expectations for timeline and cost.
Step 1: Choose the Right Location
Select a spot with ample natural light and room outside for the window’s projection. For kitchen installations, above the sink is the classic choice.
Step 2: Measure Carefully
Measure the opening and ensure you purchase a window that fits properly. Custom sizing is available but can affect cost and lead time.
Step 3: Select Materials
Choose a window with energy-efficient glass (preferably Low-E, double- or triple-pane), durable framing (vinyl or composite for low maintenance), and side vents if you want airflow.
Step 4: Remove the Existing Window
The old window must be carefully removed without damaging the surrounding wall. This includes detaching the window, trim, and insulation, as well as addressing any structural adjustments needed.
Step 5: Prepare the Opening
Frame out the opening to fit the new garden window. This might require reinforcing the header and sill to support the added weight and projection of the unit.
Step 6: Install the Garden Window
Position the window in the opening, level it, and secure it in place. Ensure the window is plumb and properly supported, especially if it’s a large unit.
Step 7: Insulate and Seal
Apply high-quality insulation and sealant around the window frame to prevent drafts and moisture intrusion. Flashing may be needed for waterproofing, especially in rainy climates.
Step 8: Finish Interior and Exterior Trim
Install trim, caulking, and any drywall or paint touch-ups to blend the new window with the rest of the room. If desired, add shelves inside the garden window for extra planting space.
Step 9: Clean and Test
Remove any construction debris, clean the window, and test the operable panels (if included). Your new garden window is ready for use!
Design Tips for a Kitchen Garden Window
Want to make your garden window even more functional and beautiful? Try these simple enhancements:
- Use terracotta or matching ceramic planters to create a cohesive look.
- Install under-shelf grow lights to extend growing time during winter months.
- Incorporate herbs like basil, mint, and chives—they thrive in small containers and are frequently used in cooking.
- Decorate seasonally with miniature pumpkins, candles, or evergreen clippings to keep your space fresh and festive.
Conclusion: A Window That Brings the Outdoors In
A garden window kitchen upgrade is more than just a stylish remodel—it’s a lifestyle choice. Whether you’re nurturing herbs for weeknight dinners or tending tropical plants through the snow, a window greenhouse creates a connection to nature that lasts year-round.
At Compass Exteriors, we specialize in helping chefs, gardeners, and plant lovers bring their dream garden windows to life. From selecting the right model to seamless installation, we’ll ensure your new garden window brings beauty, sunlight, and fresh flavor to your home—every season of the year. Contact us today for a consultation!